I have tested different databases, namely MySQL, Microsoft SQL, and PostgreSQL, using docker containers. I would like to share my deployment process.
I will follow these steps, below.
Centos 8 installation
Docker deployment
Portainer for container management
MySQL container installation
Microsoft SQL container installation
PostgreSQL container installation
Conclusion
Step 1. Centos 8 installation
I used vmware workstation for Centos 8 server installation. Virtualbox, Proxmox, or ESXI can be used. Giving enough space for database implementations can be good option.
Step 2. Docker deployment
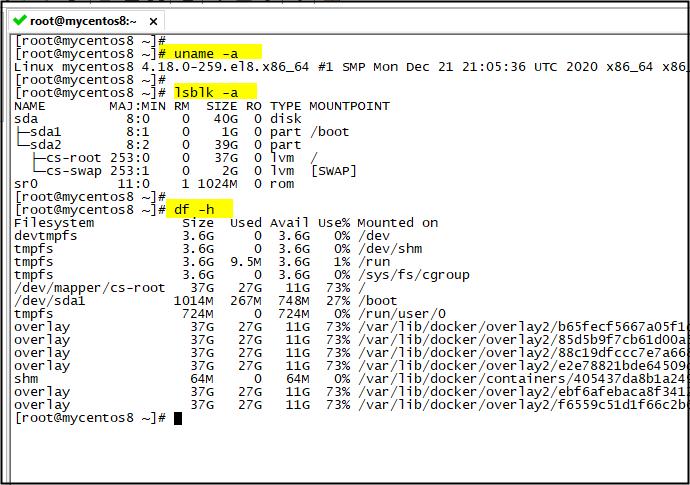
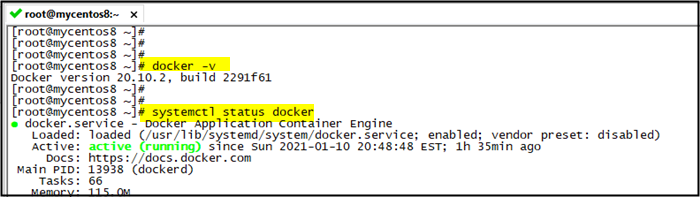
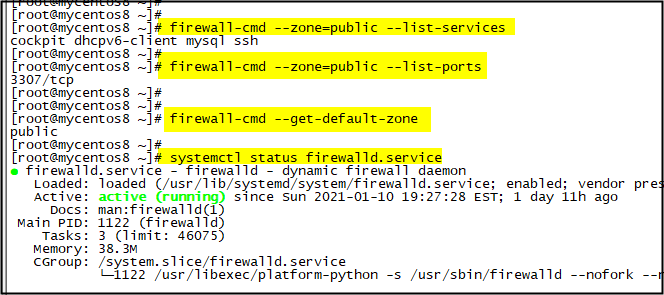
It is straight forward to install it. I will skip it, as it can be found on google easily. I just want to focus on specific installations. There are some outputs from my centos 8.
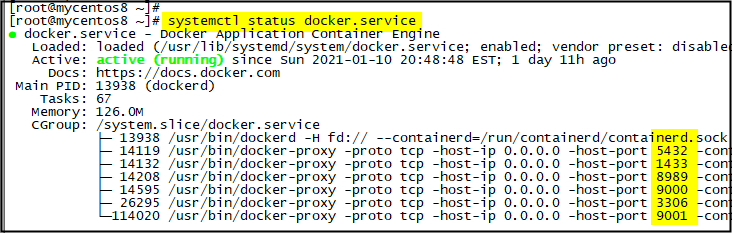
After some containers installation, port numbers can be seen, PostgreSQL 5432, MicrosoftSQL 1433, MySQL3306, below.
Step 3. Portainer installation
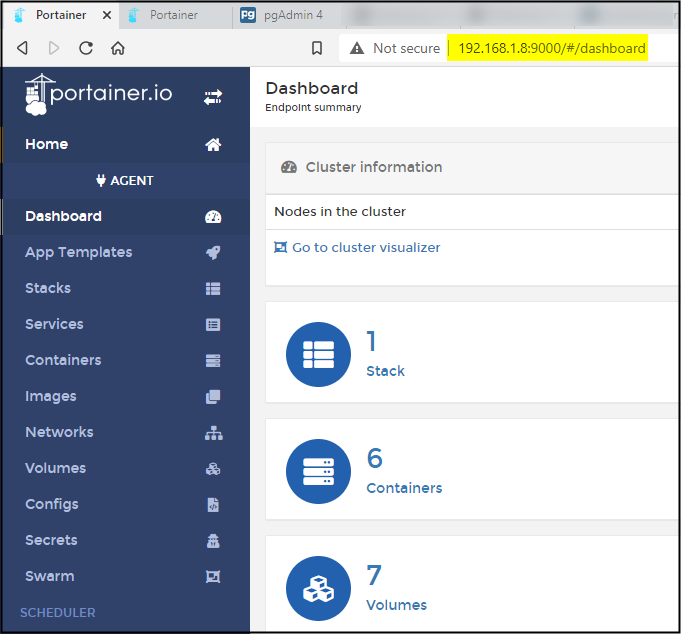
Portainer is an efficient tool to manipulate and manage docker containers.
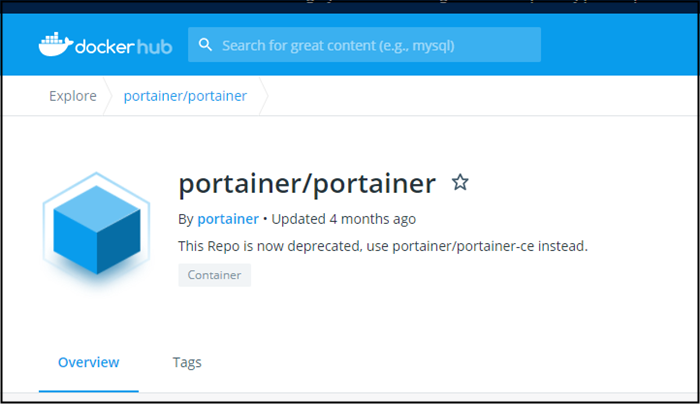
Deployment can be found easily on the internet. This is a basic command to pull it, below. GUI can be seen, below.
docker pull portainer/portainer
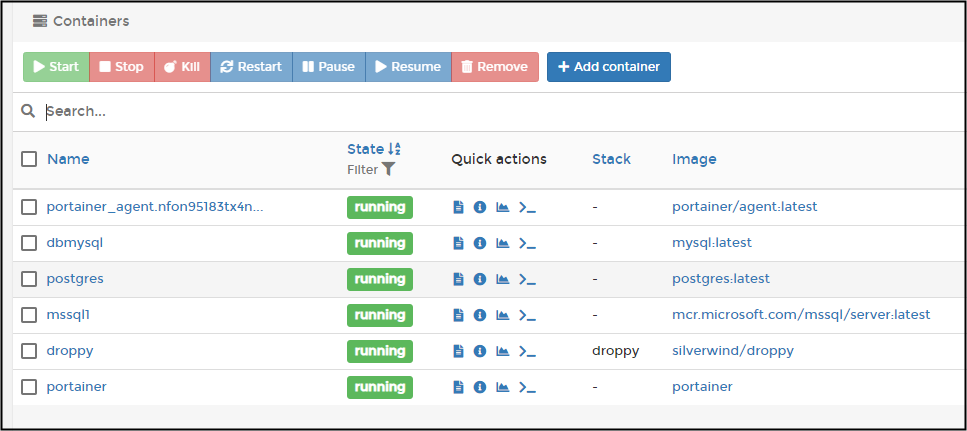
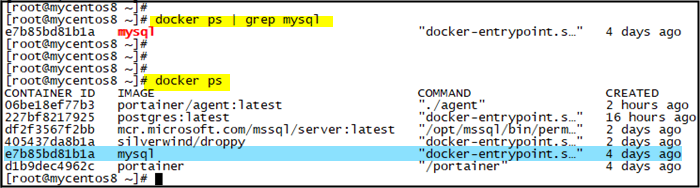
After installing sql containers, it will be like this, below.
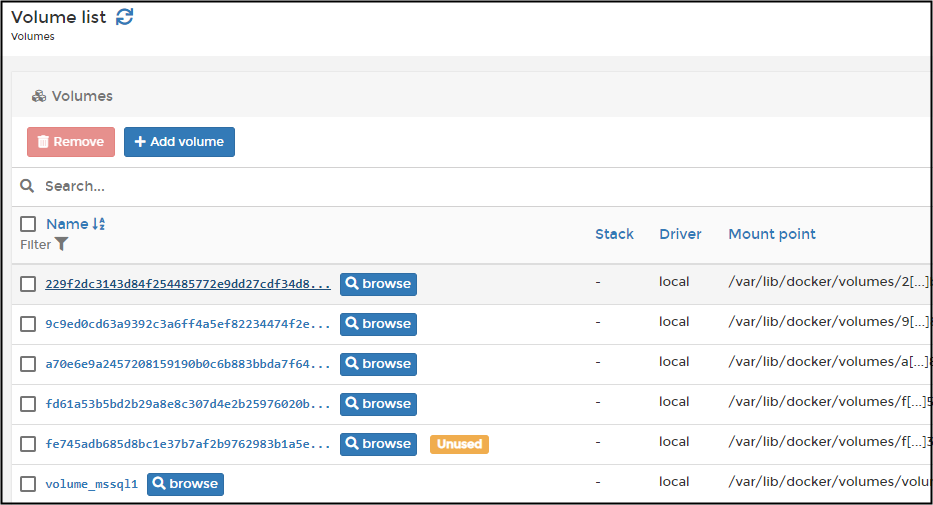
Volume list can be seen. I am able to add, remove and change any file name using it. It is so practical to transfer any data.
Step 4. MySQL container installation
It is time to install first database, MySQL. Pull its container from docker hub.
I set a password as Test123 while default user is root. They can be changed later.
docker pull mysql
docker run –name dbmysql -p 3306:3306 -e MYSQL_ROOT_PASSWORD=Test123 -d mysql
Check the MySQL container. Also, add any service on firewall of the server. I added mysql service. Optionally, port number can be added such as 3307 that will be used for MariaDB. It can be found other samples.
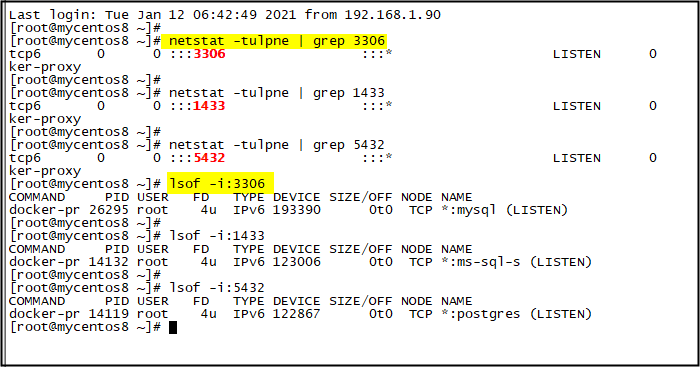
Check listening ports, once the containers run, 3306, 1433, 5432, below.
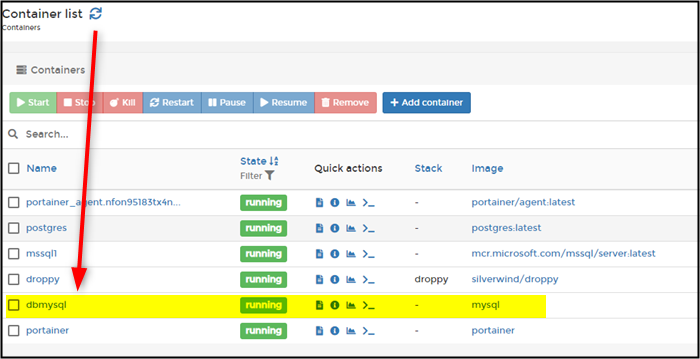
Check it from Portainer and cli. I stick to Portainer to manage them.
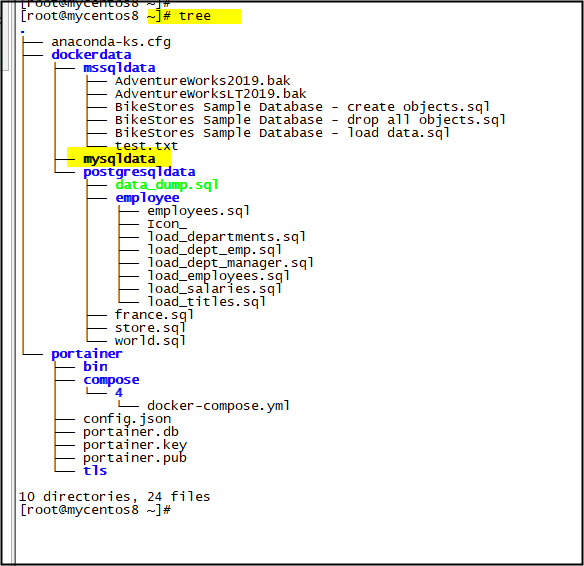
A data can be imported by secure copy scp, Filezilla. I also added a shared folder for docker containers in case of any failure on them. I can take a snapshot or backup of this shared folder regularly. Dockerdataand sub drives can be seen on the centos8 server. I will add it.
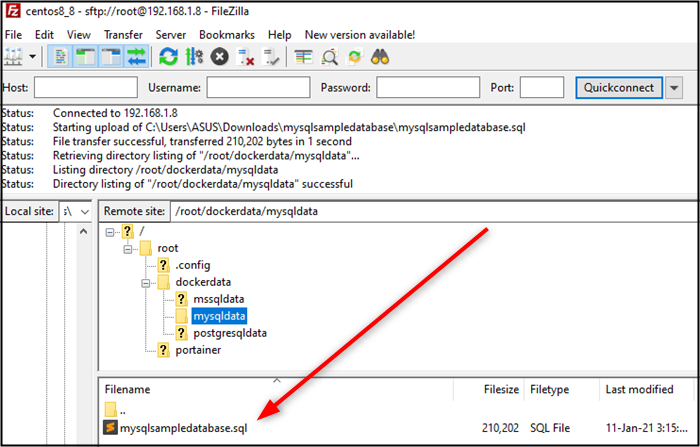
I transferred a simple SQL data for my implementation using Filezilla, below.
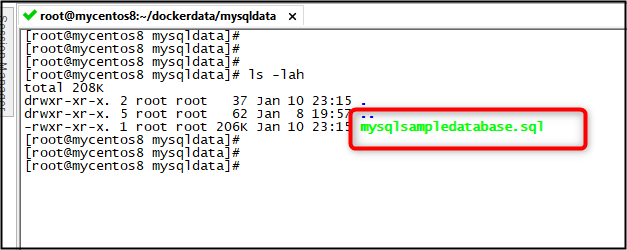
Now, I can it inside of /root/dockerdata/mysqdata drive, below.
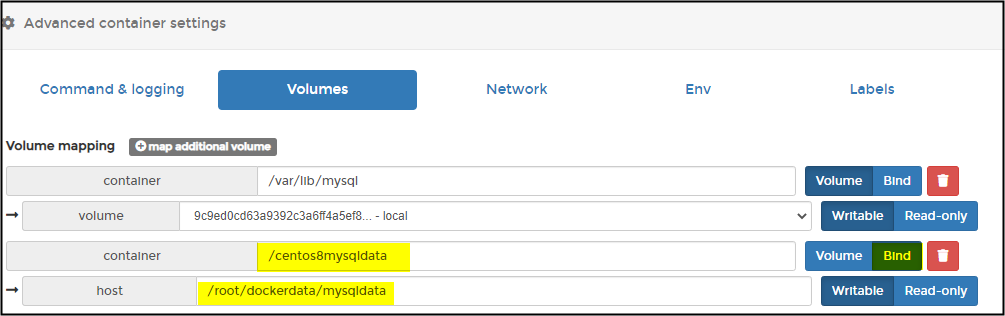
MySQL container should be able to access host server’s shared folder, namely mysqldata. Therefore, it should be attached on the container as a volume area. This will be done for for other containers.
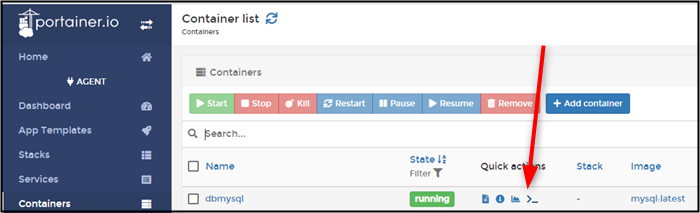
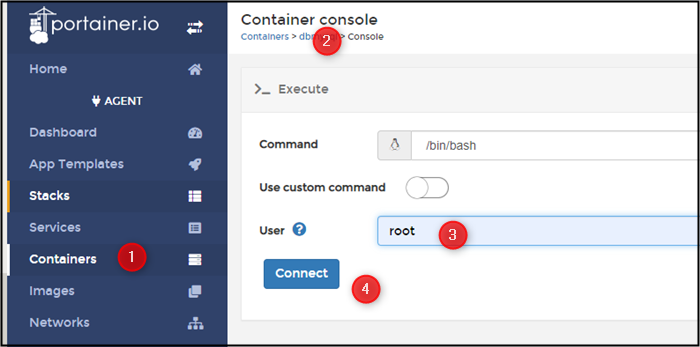
Click on command exec to manage mysqlcontainer, below.
Now, I can see the files inside of centos8mysqldatafolder that is shared by centos8 server from docker container.
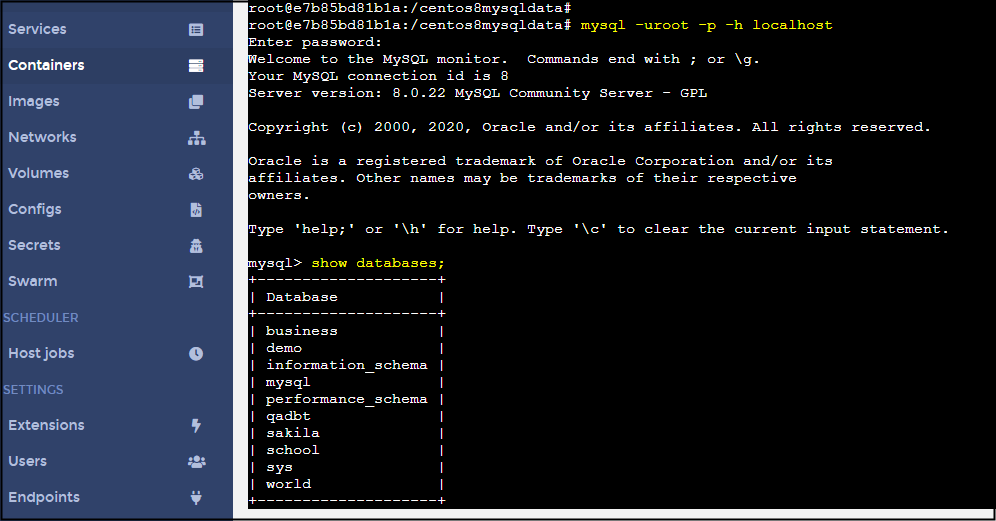
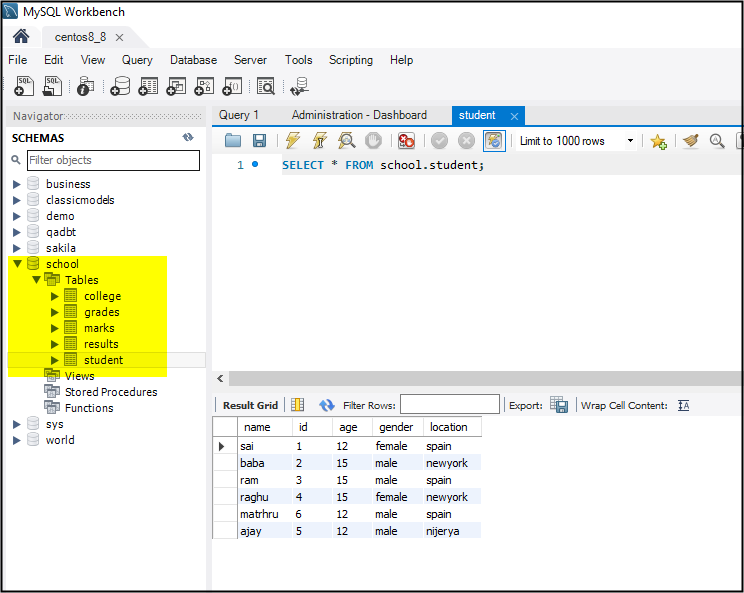
Log in the database, and import sample SQL data, below.
mysql -u root -pTest123
CREATE DATABASE mysqlsampledatabase;
mysql -uroot -p mysqlsampledatabase < mysqlsampledatabase.sql
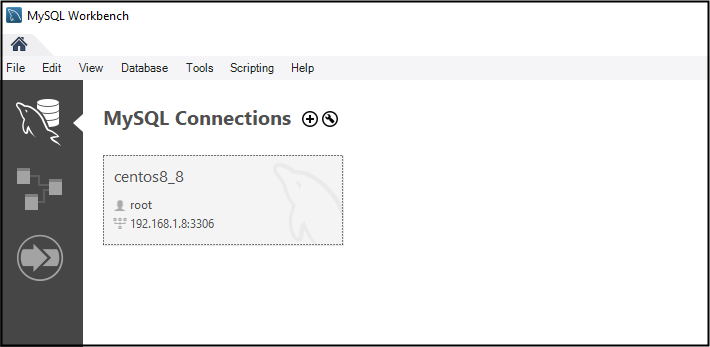
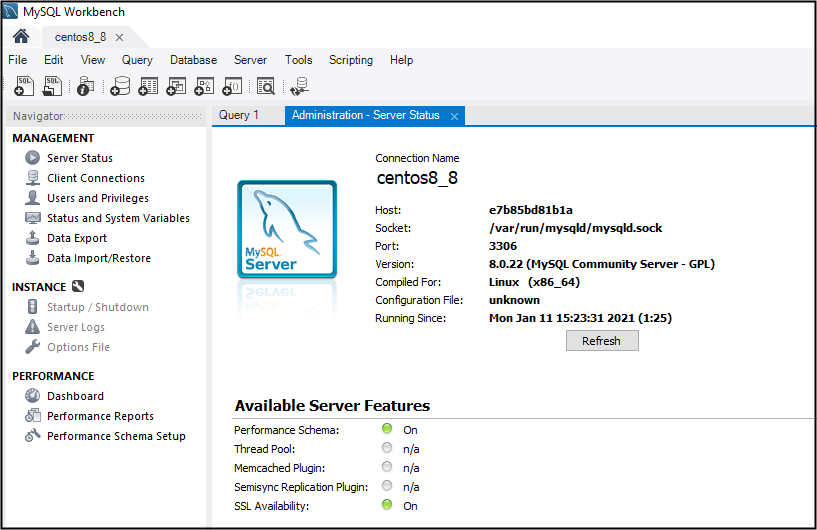
MySQL Workbech is a free tool to access to the database.
Database can be monitored on its main dashboard.
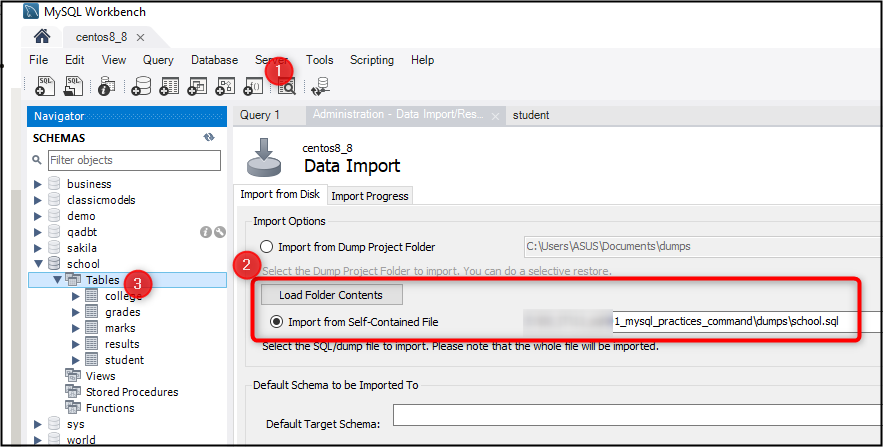
MySQL Workbench allows to import and export data, below.
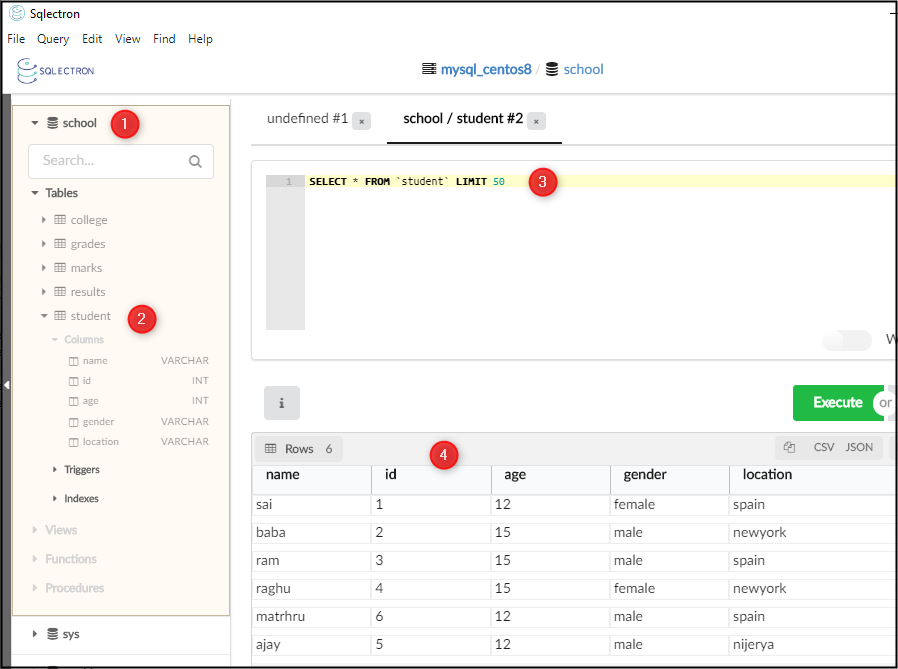
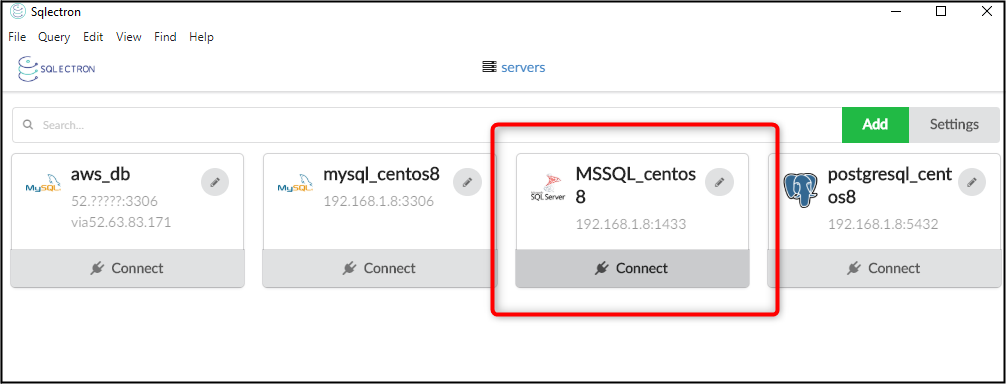
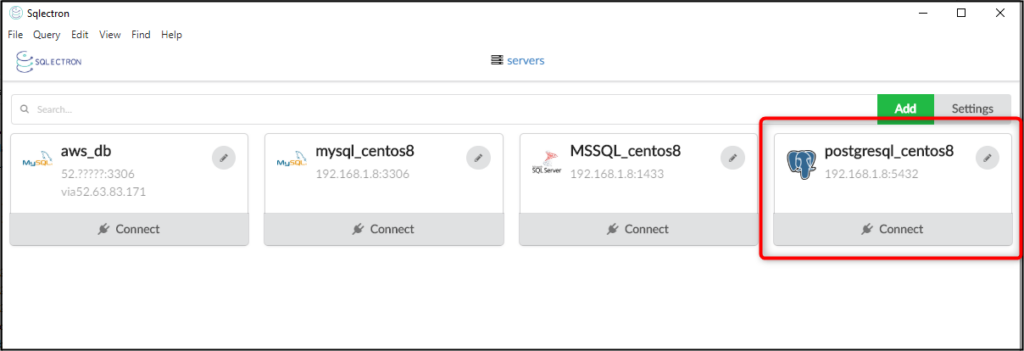
Sqlectron is another option to connect the database. I used it for database management.
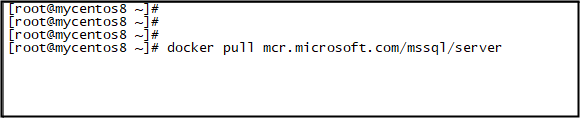
Step 5. Microsoft SQL container installation
Follow the same steps. Go to dockerhub and pull Microsoft SQL server container.
docker pull mcr.microsoft.com/mssql/server
docker run -e ‘ACCEPT_EULA=Y’ -e ‘SA_PASSWORD=Test123/’ -p 1433:1433 -d mcr.microsoft.com/mssql/server:latest
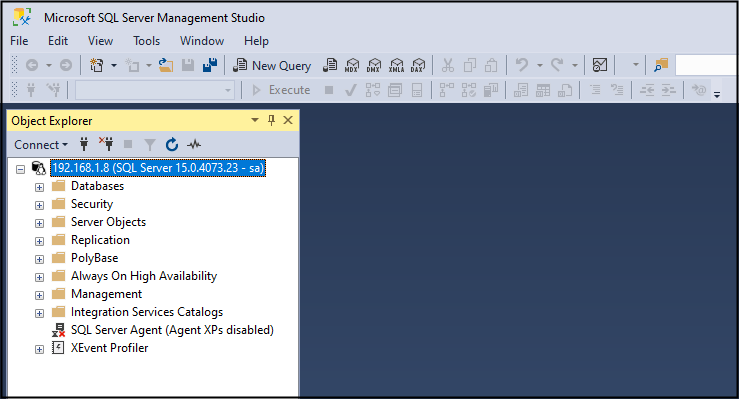
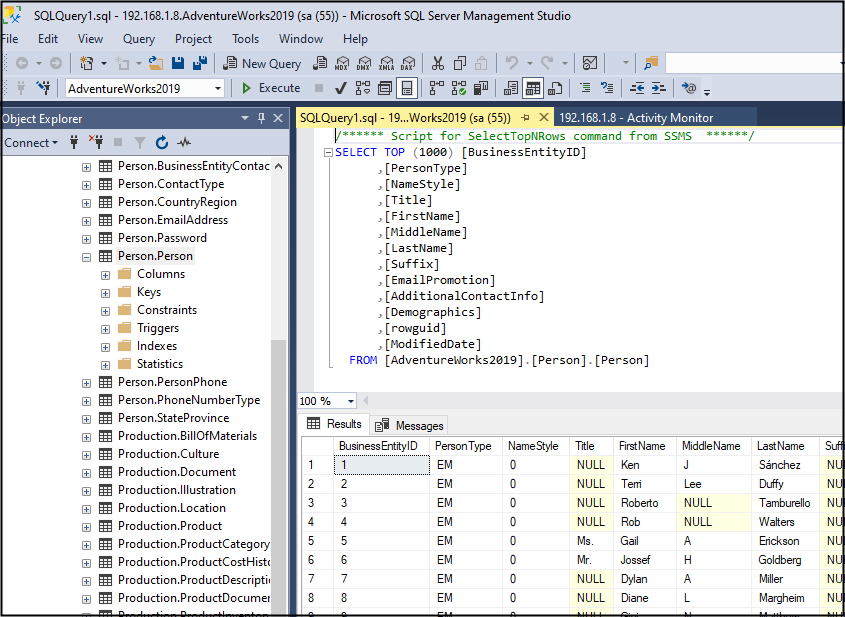
Download Microsoft SQL Server Management Studio and connect the database. Default user is “sa” and password is configured as “Test123/” by me. They can be changed later.
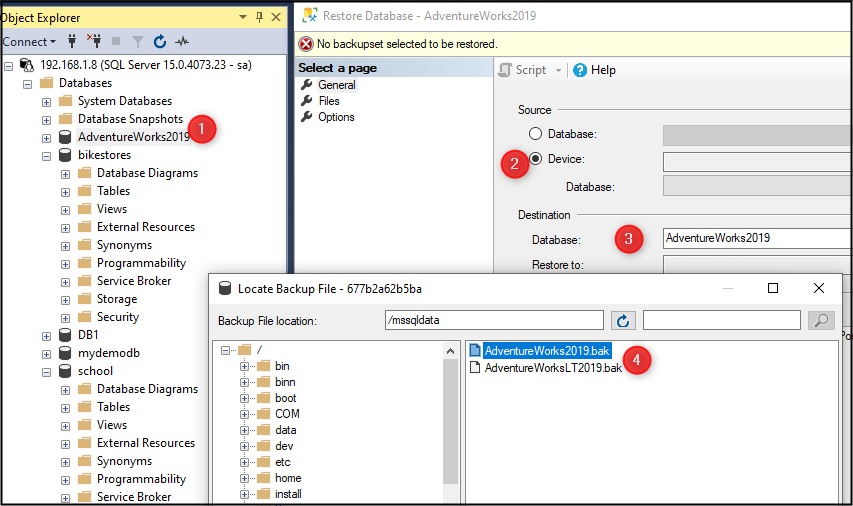
Deploy some data, below. It is easy with Management Studio, below.
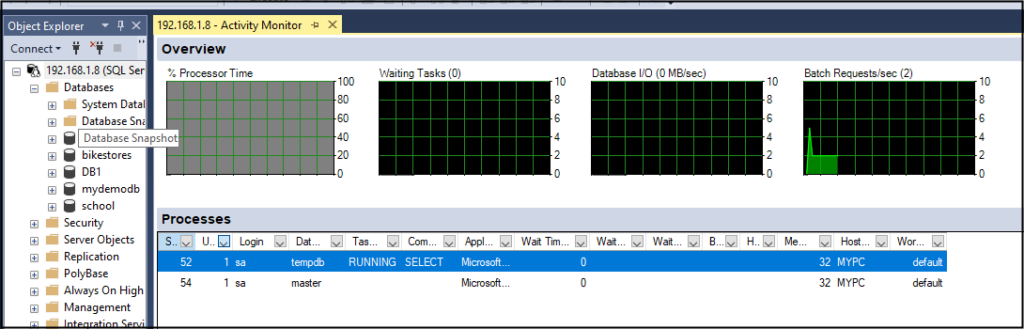
Database activities can be seen on its dashboard, below.
I used Sqlectron for the database management, again.
Step 6. PostgreSQL container installation
I used the same steps for PostgreSQL container installation. I can import data using either command line or pgamin web browser below.
docker run –name postgres -e POSTGRES_PASSWORD=Test123 -d postgres -p 5432:5432
psql -U postgres -h localhost -d store < store.sql
psql -U postgres -h localhost -d store < world.sql
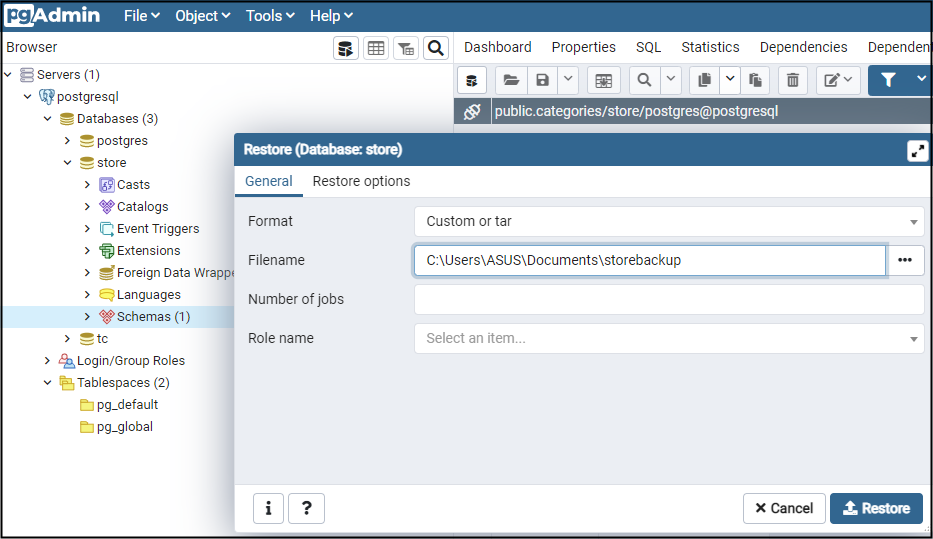
I downloaded pgadmin for PostgreSQL database management. Backup and restore can be seen, below.
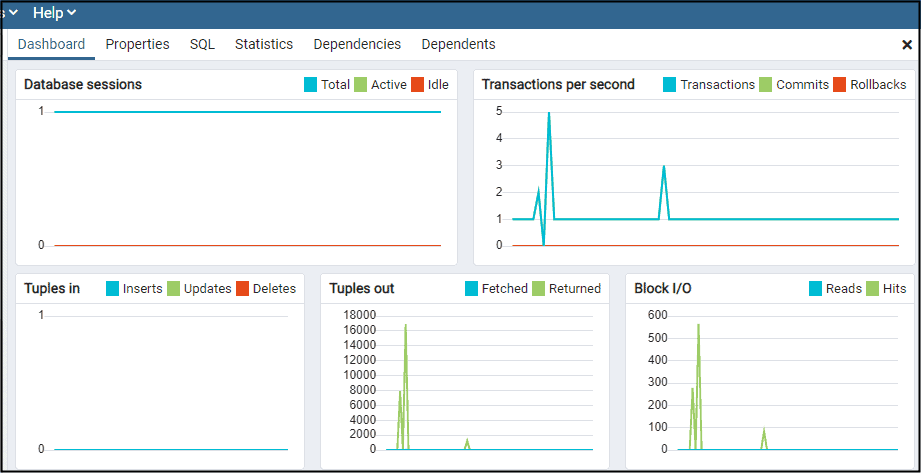
Database activities can be monitored by using pgadmin dashboard can be seen, below.
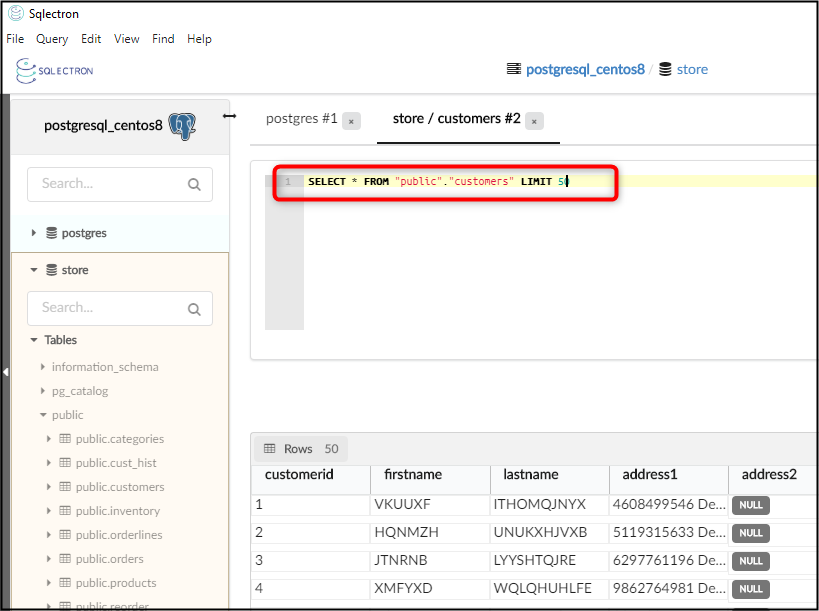
Sqlectron is used for PostgreSQL management as well, below.
7. Conclusion
As shown above, docker containers are useful to use different database or application. They are imported and exported to any other servers, if it is required. In addition, Sqlectron was used for management all of them. Its GUI is not friendly but it is practical. I hope this post is informative for you.