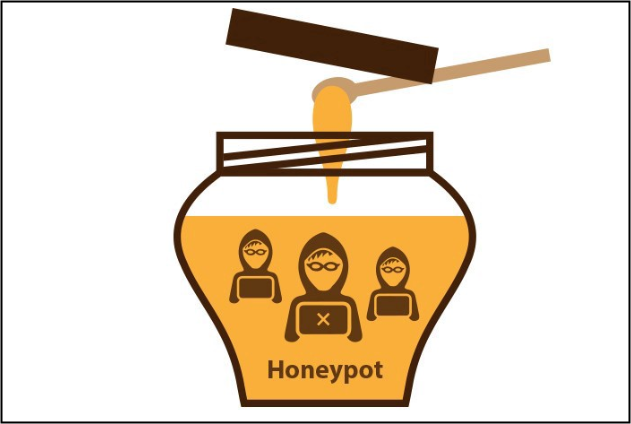
If you are interested in an IT security, you may heard about honeypot is configured as a vulnerable server to monitor attackers behavior. It is useful to collect data from them. A service provider company, namely, DTAG has released and supported an open source honeypot, namely T-POT. https://dtag-dev-sec.github.io/
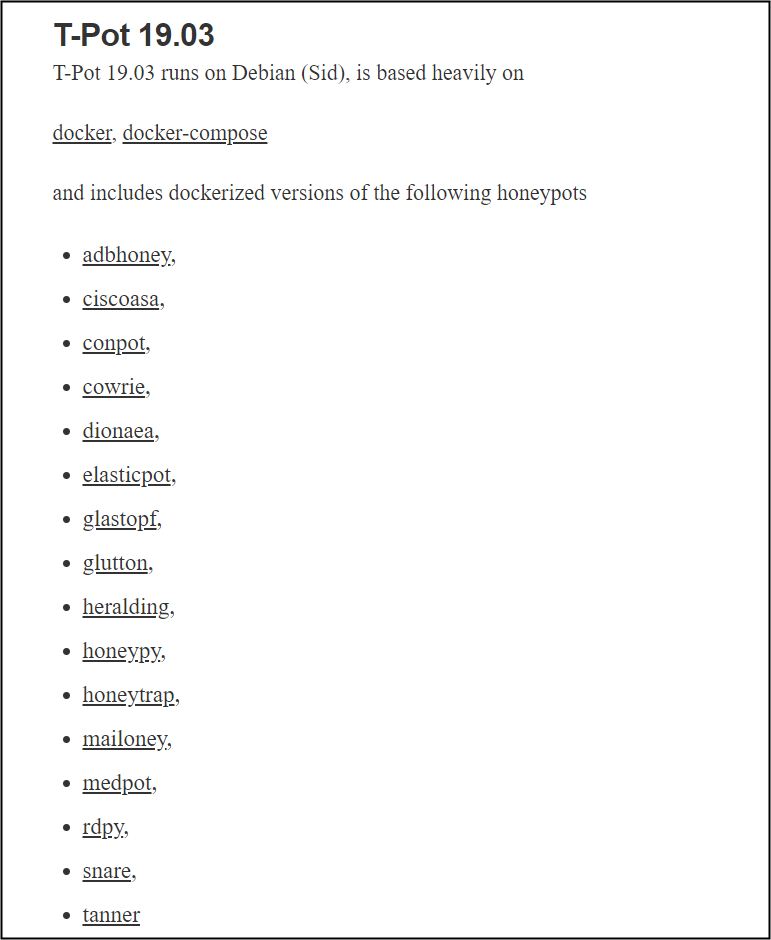
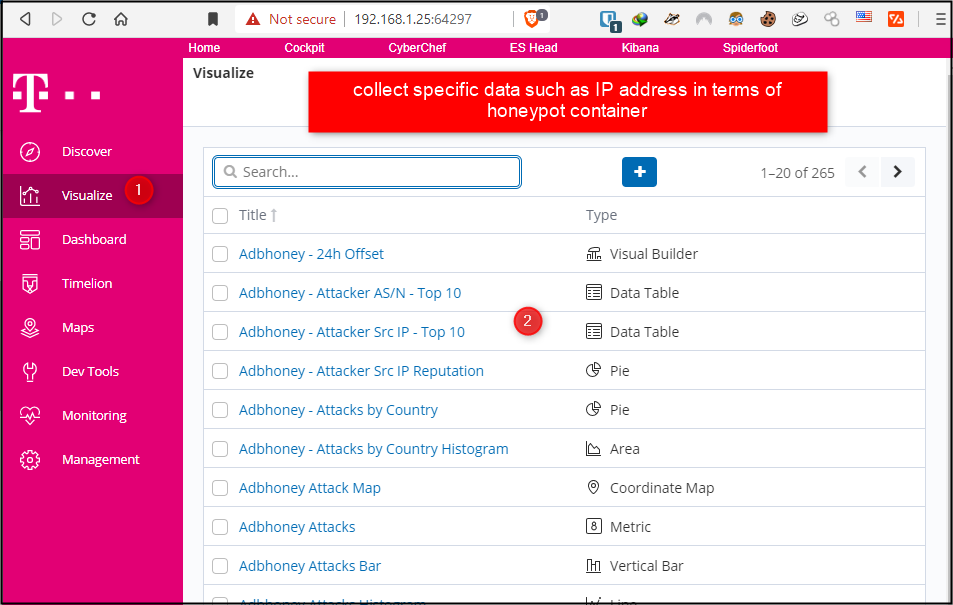
In this project, there are some docker containers that can collect different types of data from attackers, as shown below. You can access and read all the features, functions of them. Now, I would like to share my implementations and results. Lets started.
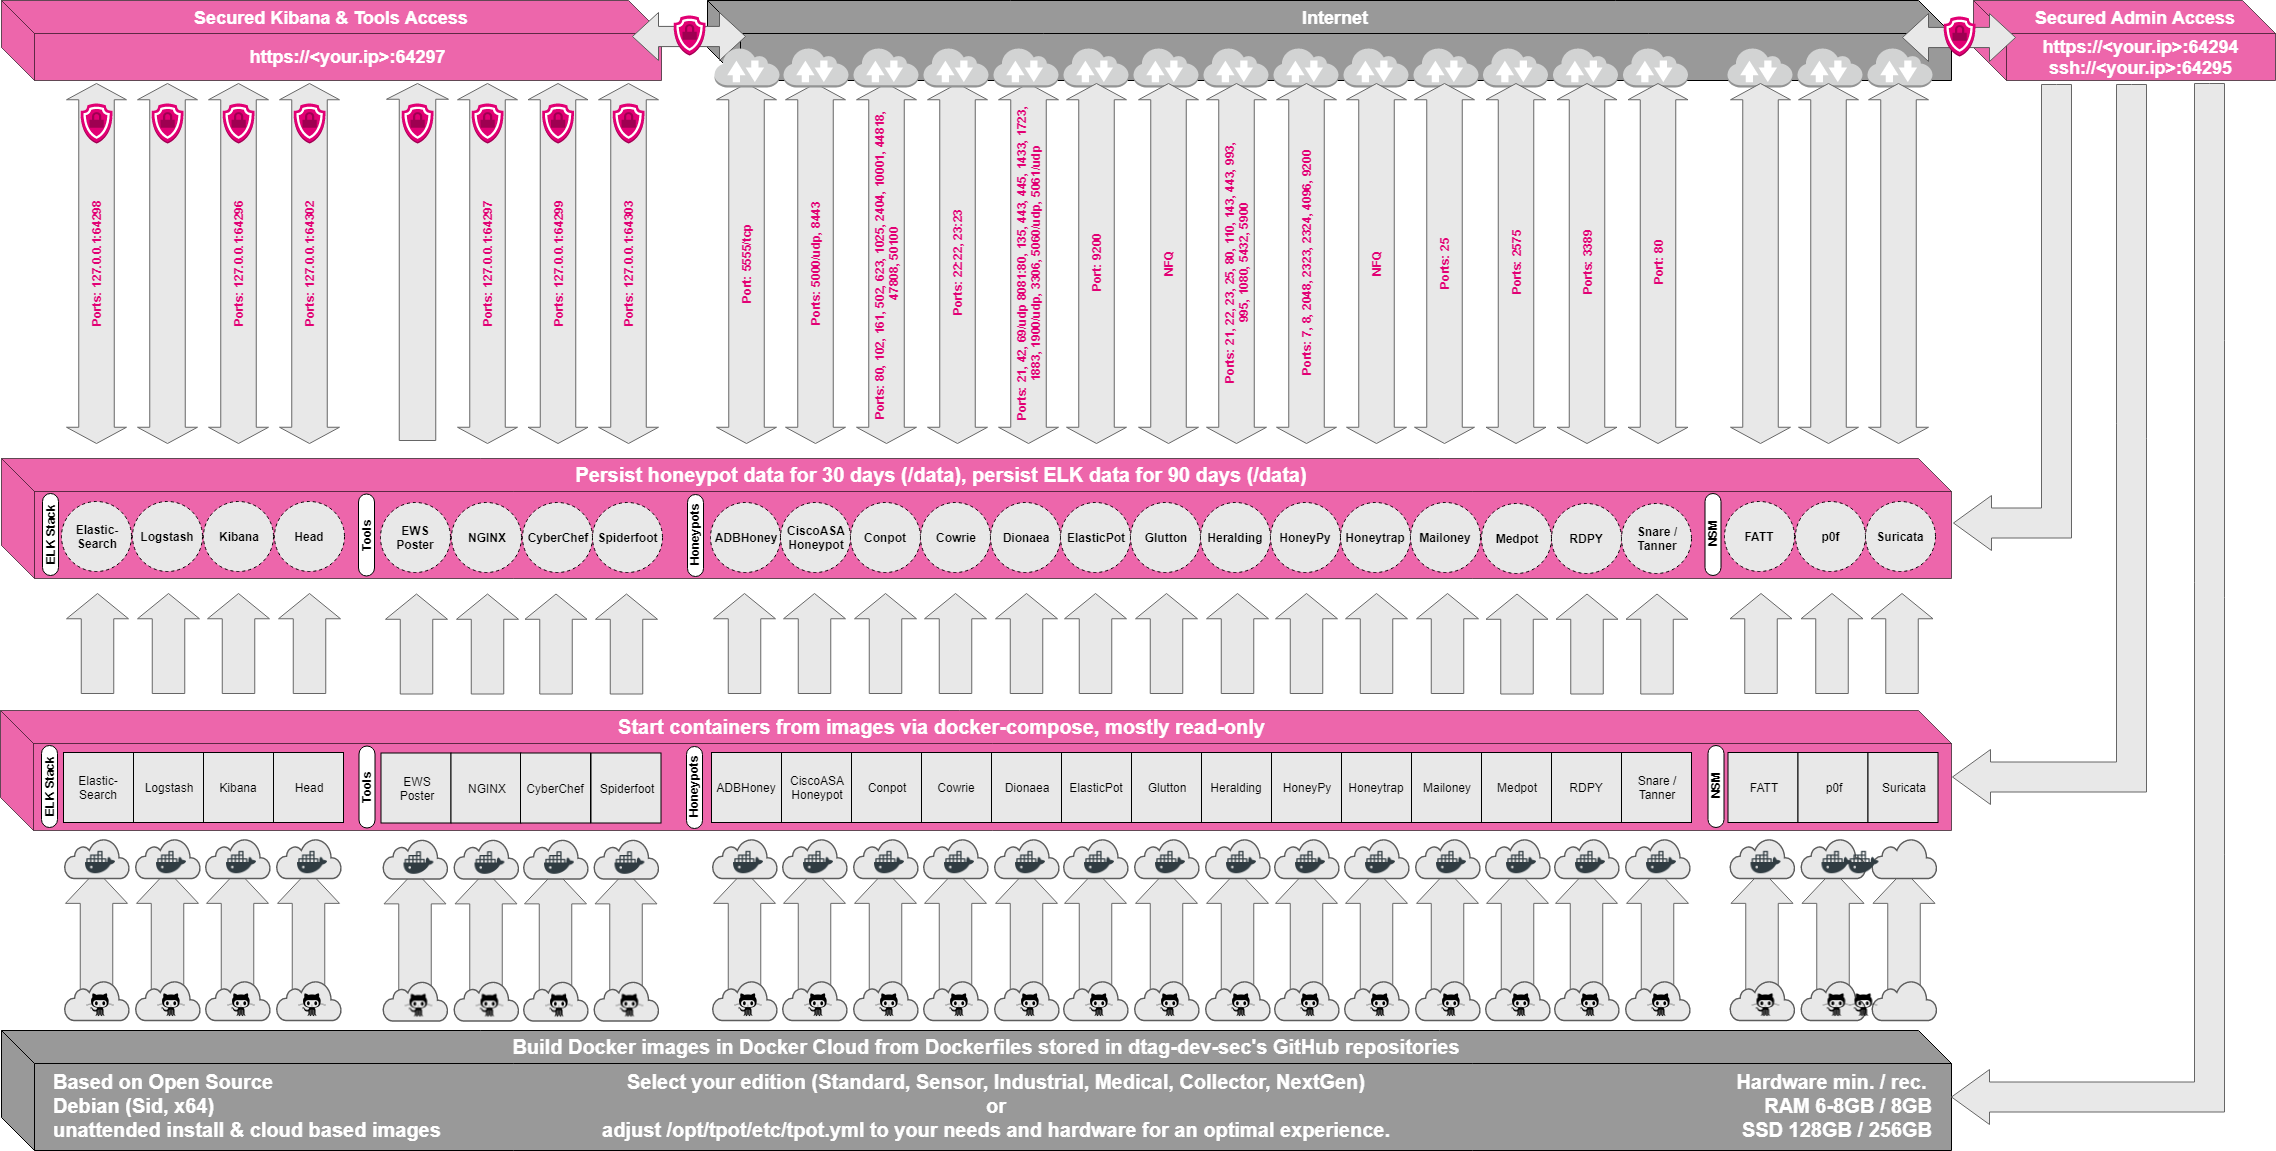
Click on this picture, below, to get a holistic understanding of main idea and how the docker containers work.
I deployed T-Pot on my home lab, VMware ESXI host, below. You can also deploy it on a cloud hosting and observe it. There are some examples on YouTube. You can find some videos at end of this post.
Step 1. Deploy T-POT
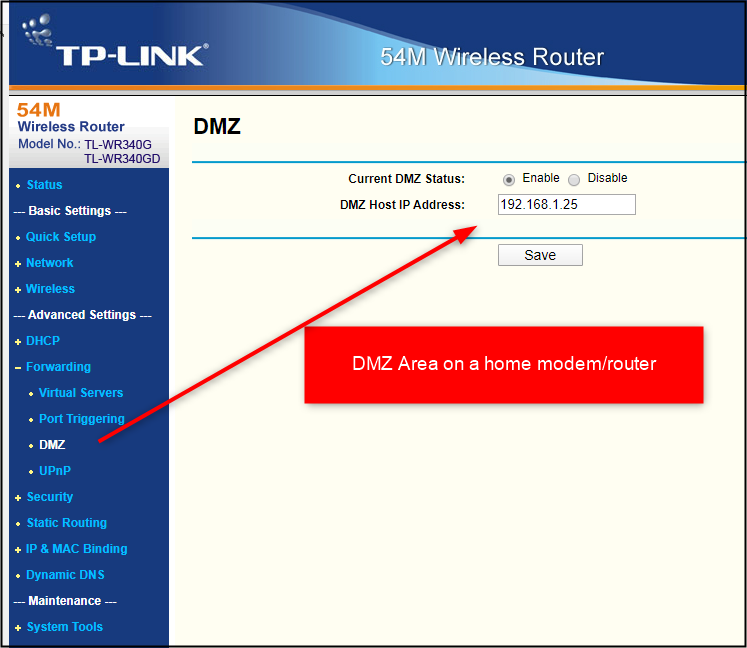
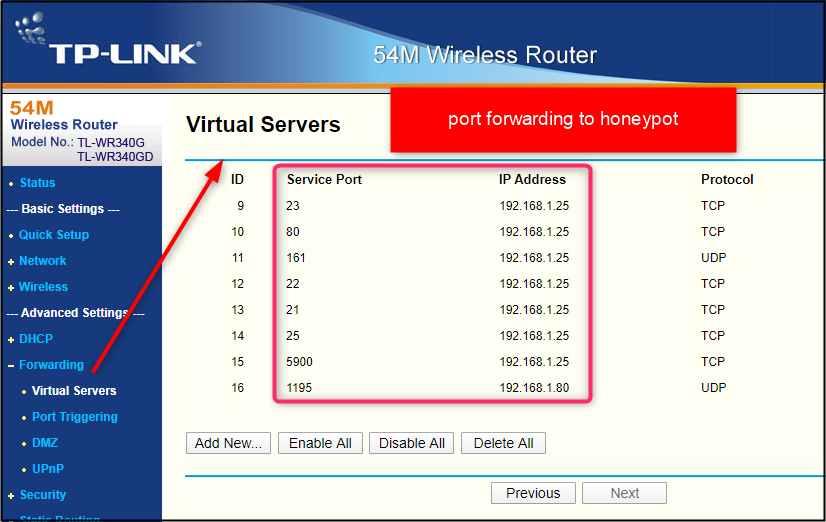
Step 2. Port Forwarding - DMZ
Some of ports should be directed to Honeypot that collects data.
This is my home modem/router that is a bit obsolete, however it works well. Look at some forwarding ports.
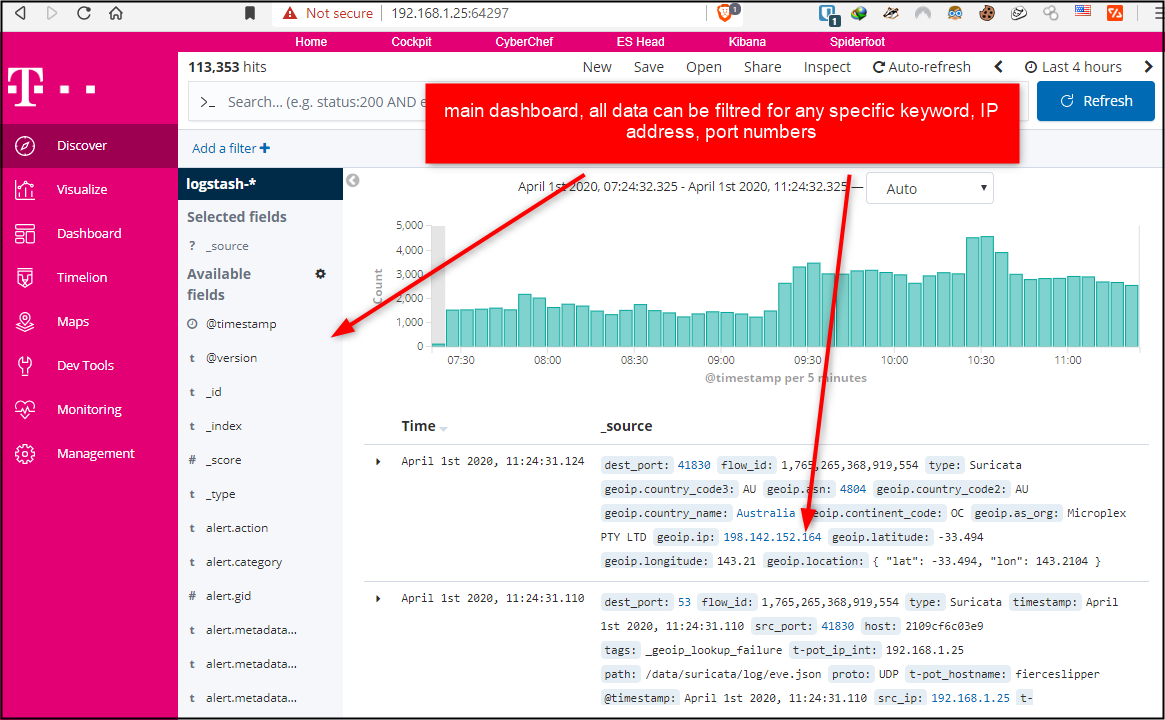
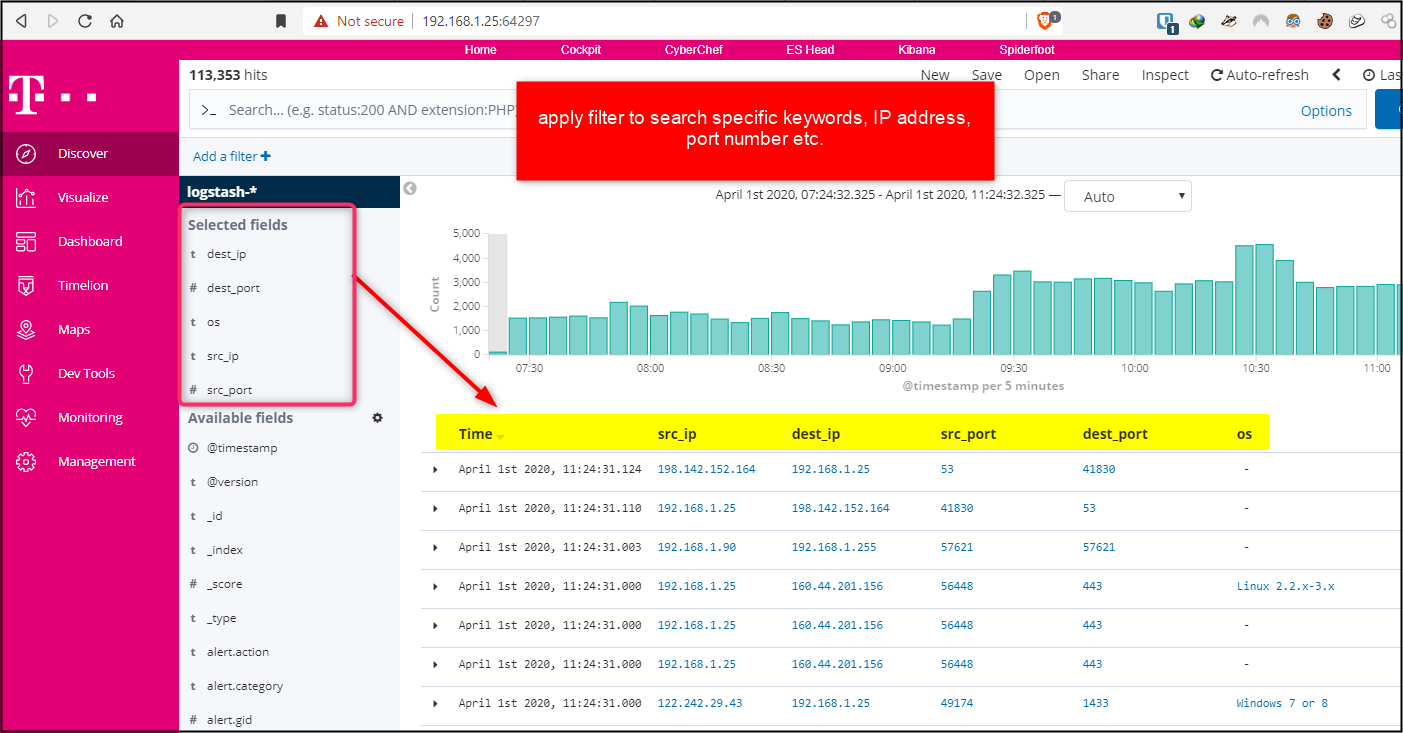
Step 3. T-POT Dashboard and Analysis
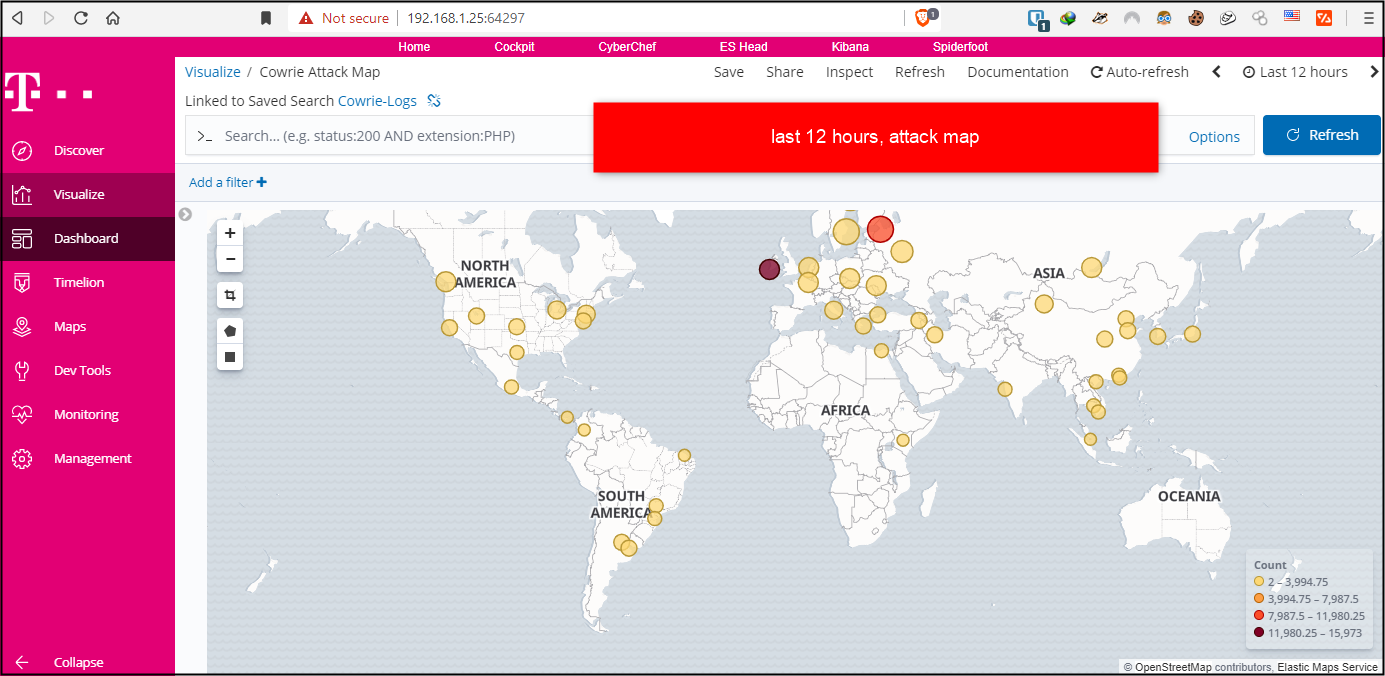
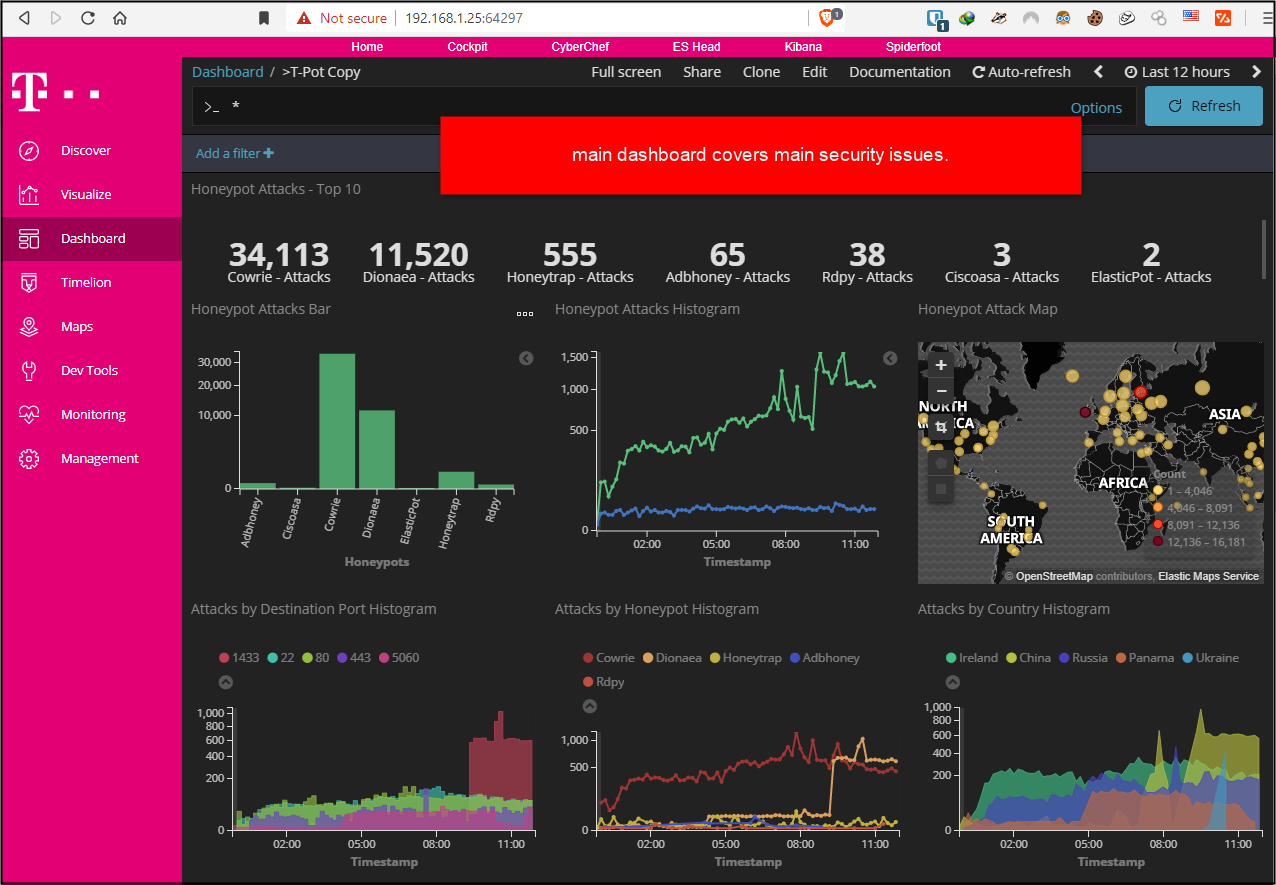
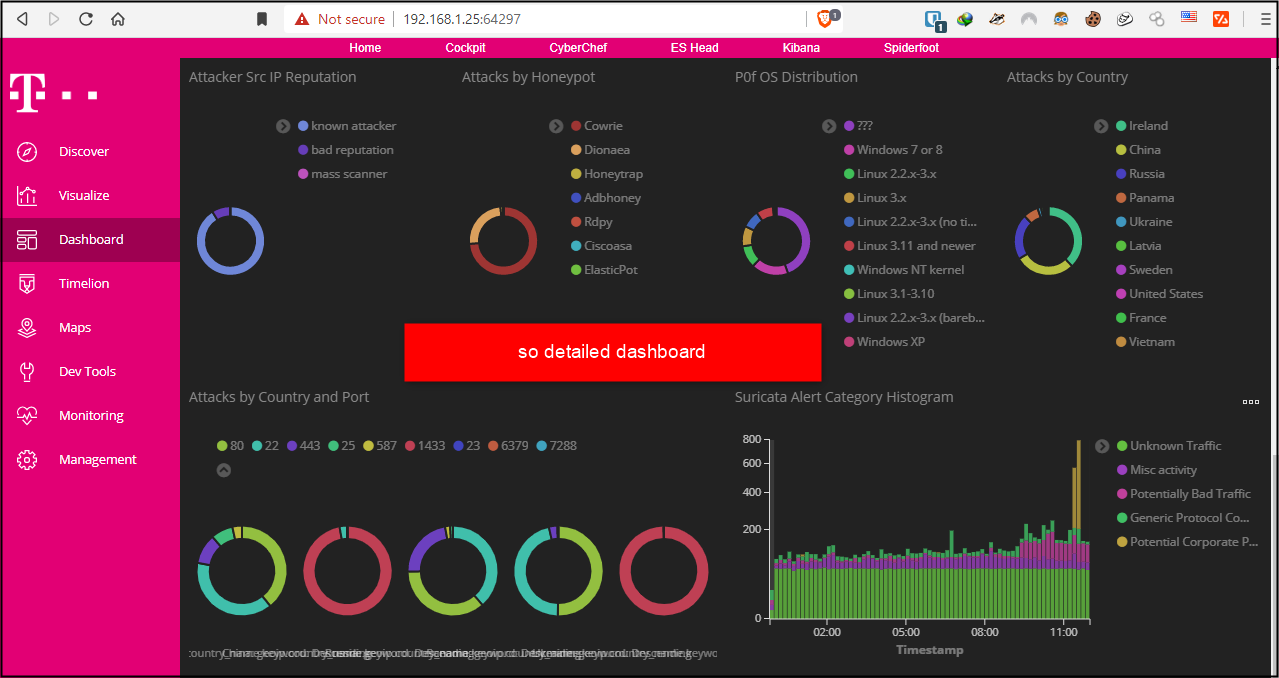
This is the main dashboard that is served by T-POT. Look at the IP address and port number of it. I can see all flow of data, filter them, or create my own dashboard.
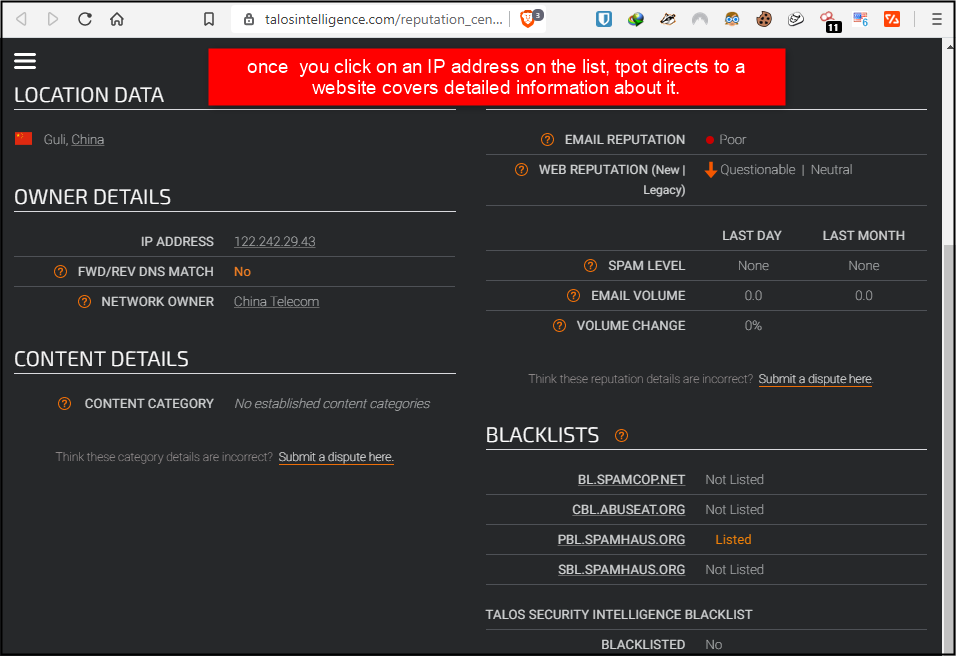
There are also different IP address on it. Dont be confused by them. Some of traffic come from data centers in Ireland, below. If you look at main dashboard, you can see more IP address from different locations.
This dashboard almost cover important services, below. Click on this picture to see detailed information.
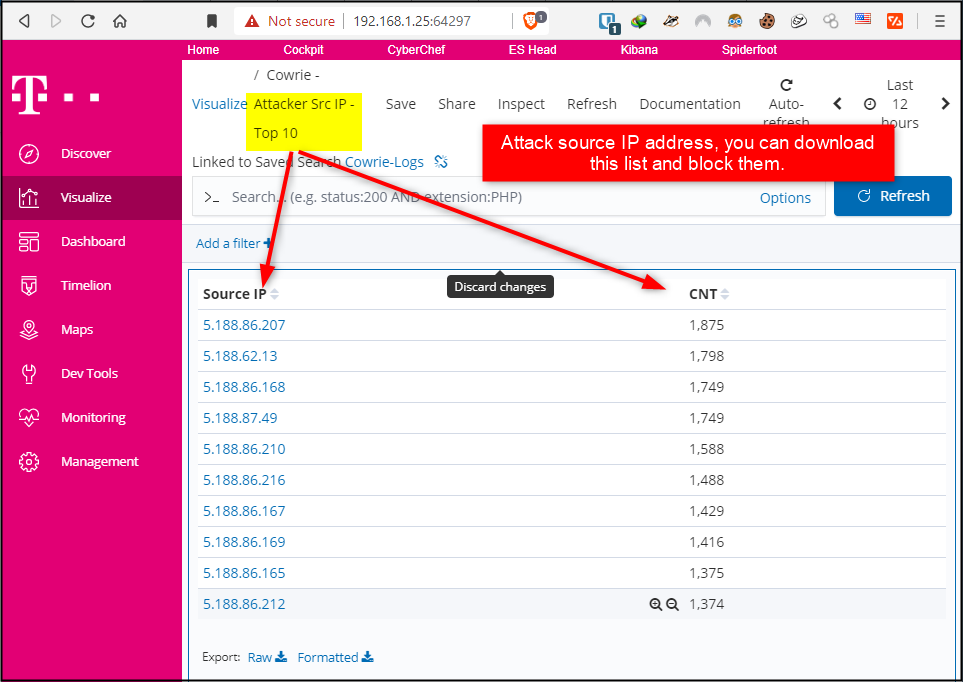
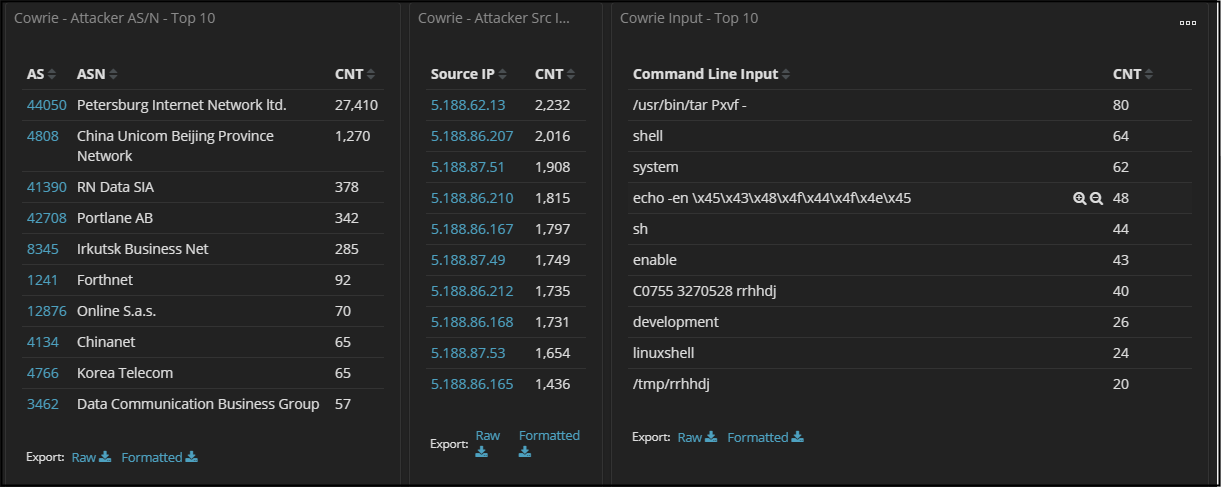
Source IP, Honeypot containers, OS, Country, attacks by port numbers can be seen on the same dashboard.
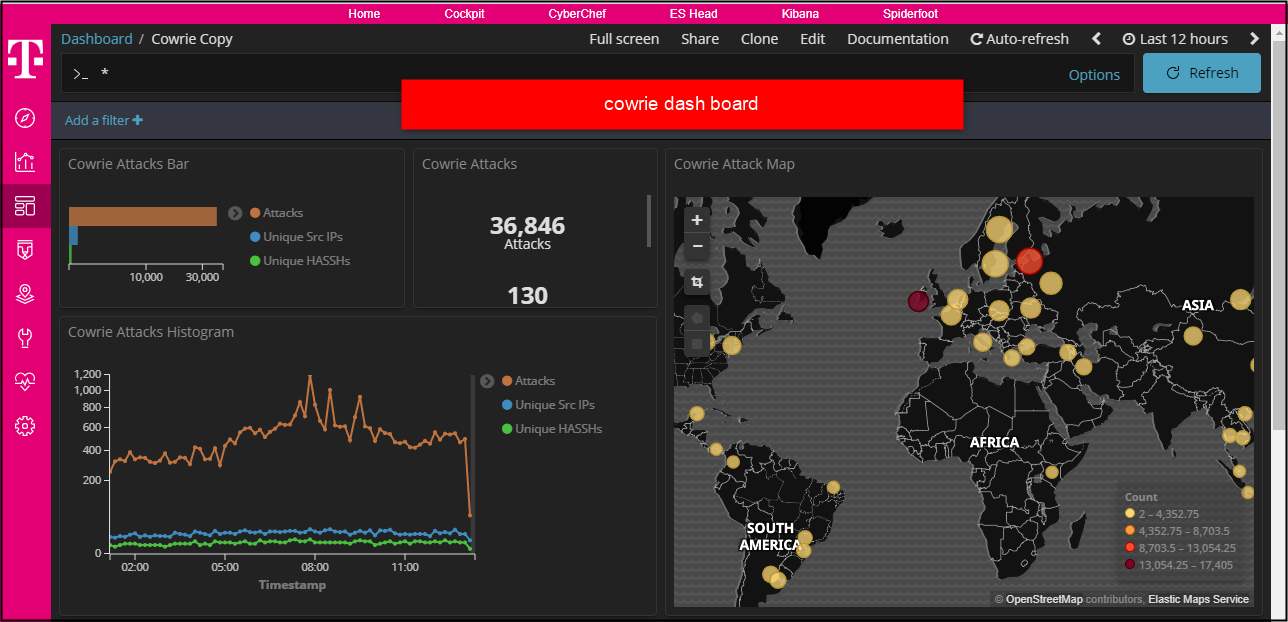
Step 4. Deep dive into cowrie service
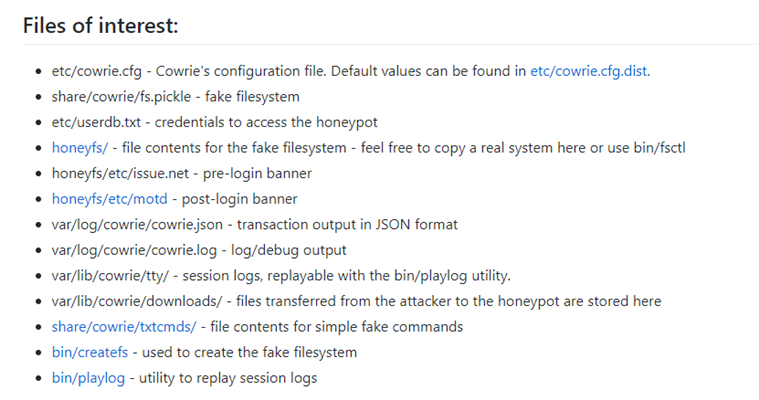
Especially , I interested in ssh service in cowrie container that allow attackers to take control of a server or computer. You can read detail information on these website,
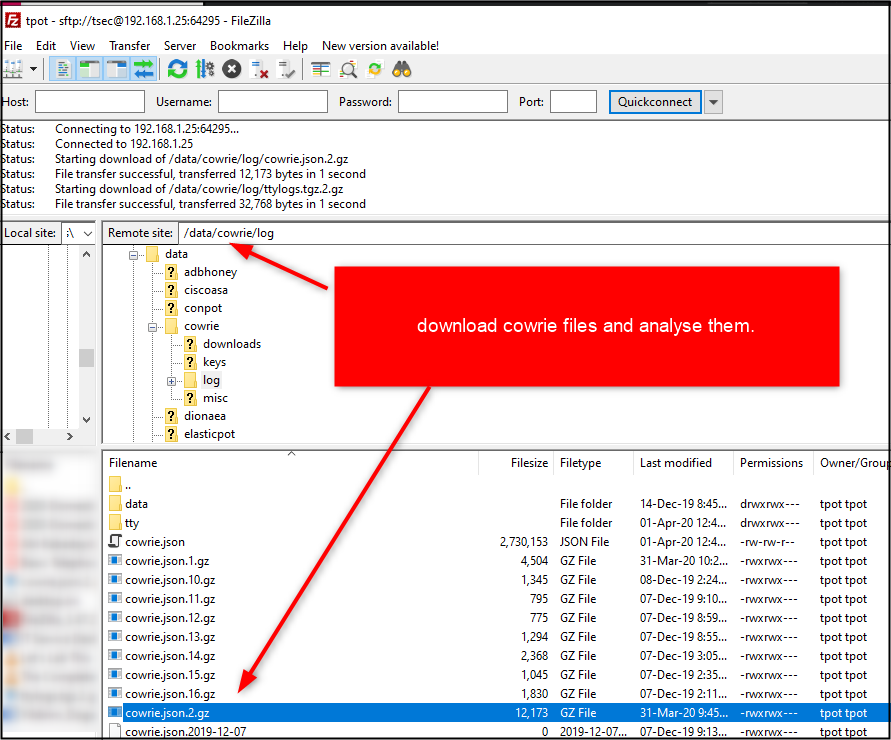
I wanted to download data file organised as json format to look at closely. You can see username and password on a dashboard as well.
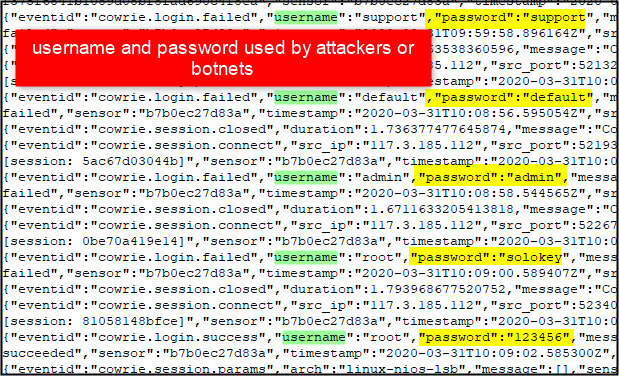
I opened this json format file on Notepad++, so I can see username password, fail or success login, below. In step 6, below, I will use one of it.
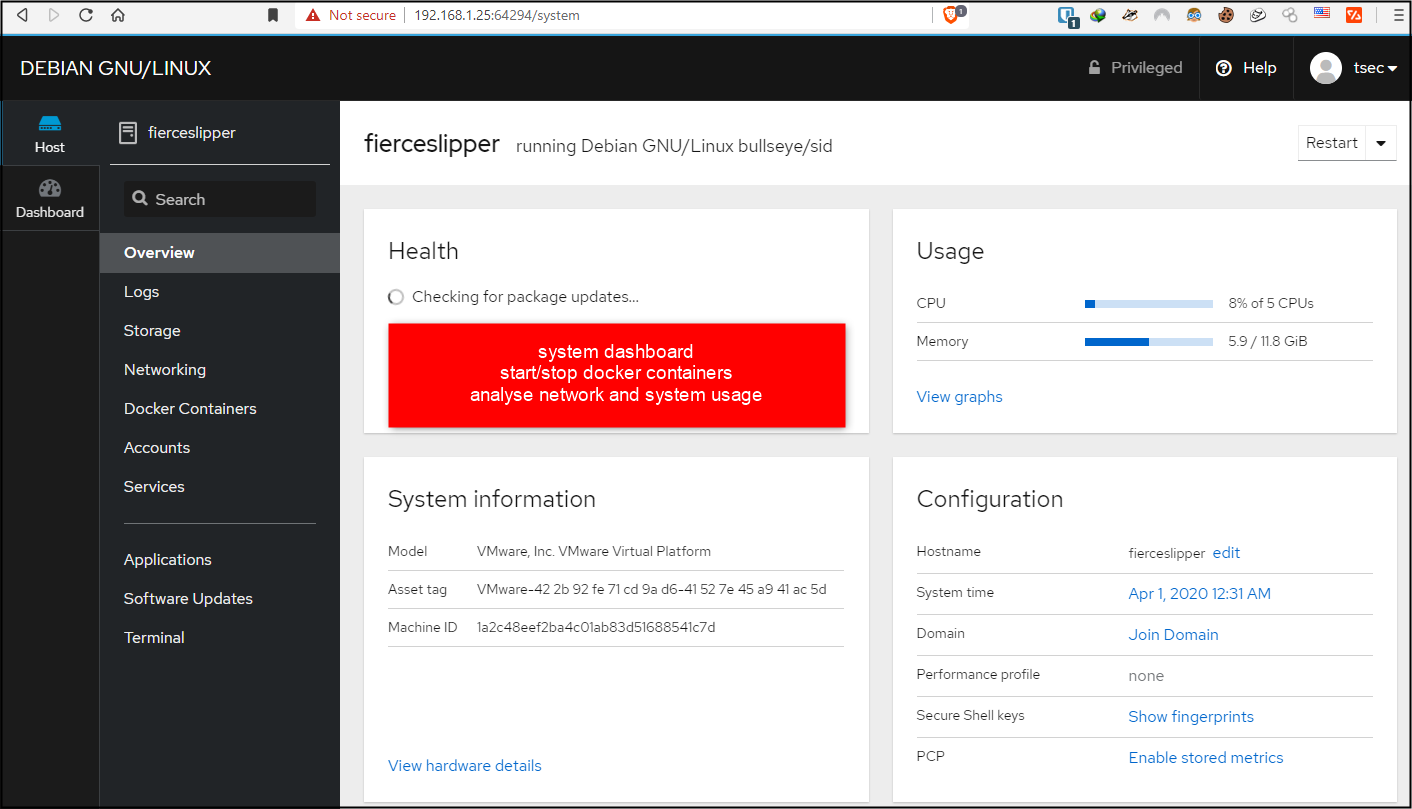
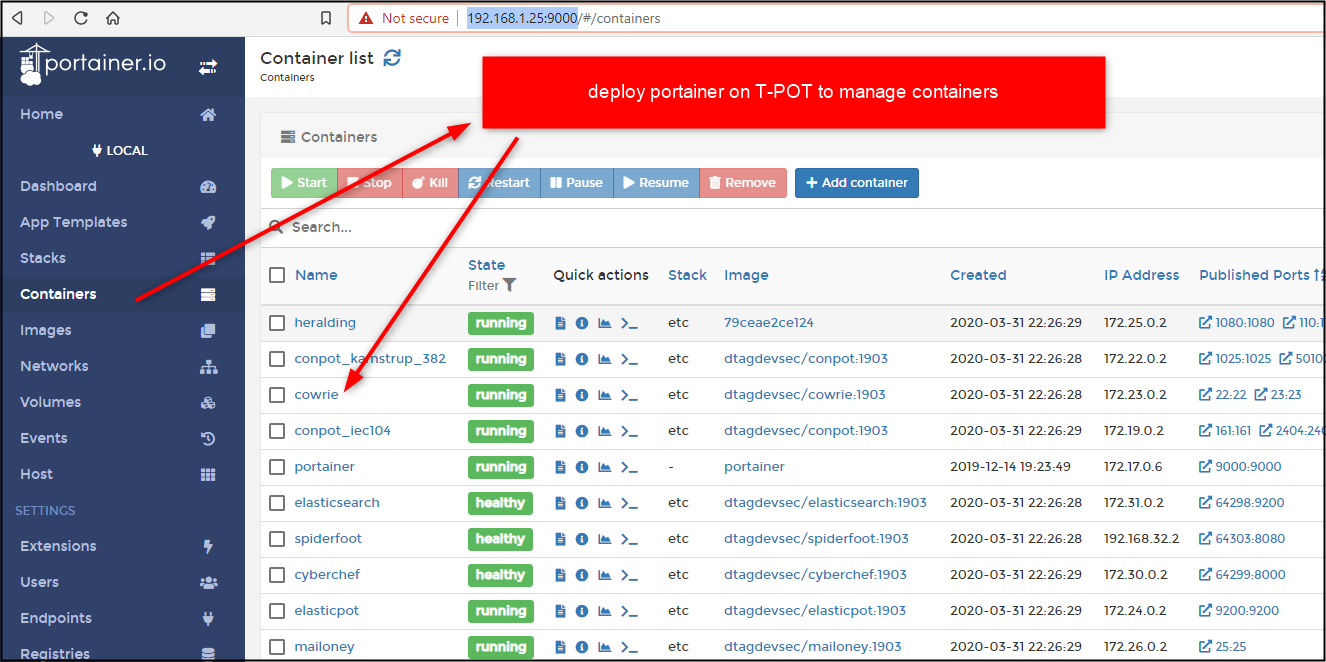
This is my additional feature on it, I deployed Portainer to manage docker containers easily. It is optional, not mandatory, below.
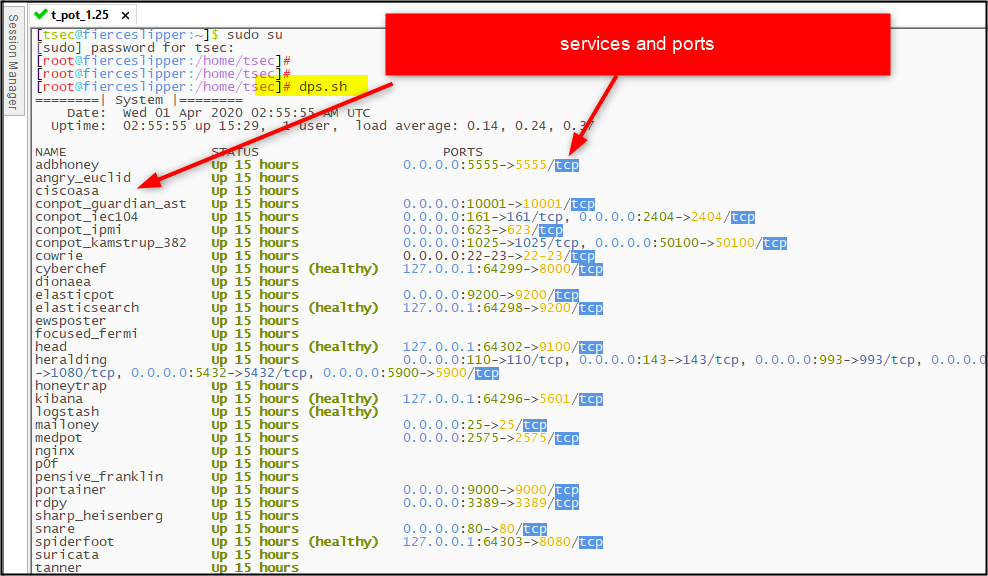
You may need to check Port numbers. Open an terminal, connect to your honeyport server and type that command ( dps.sh), below.
Step 6. Test Your Honeypot
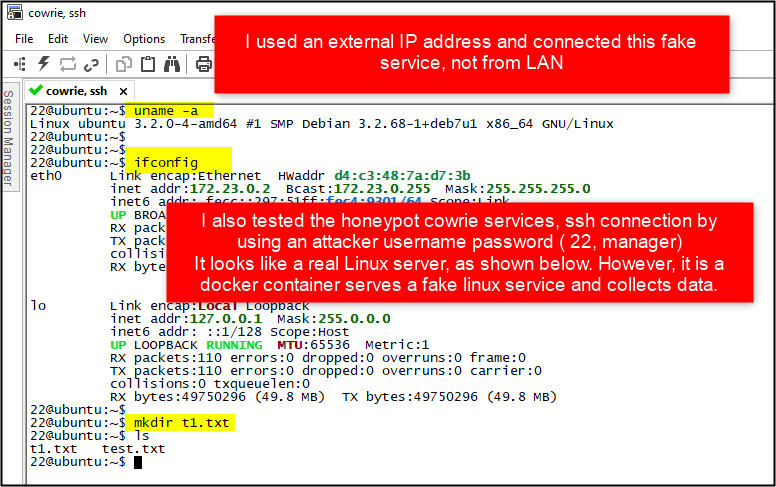
Lets proof of the concept. As I mentioned above, I downloaded a data file from the honeypot server and picked a username and password to connect this ssh services so that I can test my honeypot from outside as if I am an attacker. You can also apply a brute force attack to infiltrate this ssh service on the honeypot. This is my implementation, below.
I watched these videos on YouTube channel to understand deeply. I suggest anyone is interested in Honeypot.
In conclusion, I realized that a honeypot is useful to understand attack vectors and attacker’s behavior. Although I deployed it on my home network, there are more bots and attackers have tried to access my home network. Likewise, medium and big size companies are exposure to these kind of attacks more than a home user. It is useful, since a security administrator can observe attacker behaviors, be aware of and keep away from weak usernames and passwords. By updating malicious IP addresses on a blacklist, they are blocked for dangerous, and bandwidth consuming connections. In addition that, A attacker can scan open ports using nmap, hping3, netcat however, default port numbers can be changed for obfuscation. It will be a supplementary mitigation technique.